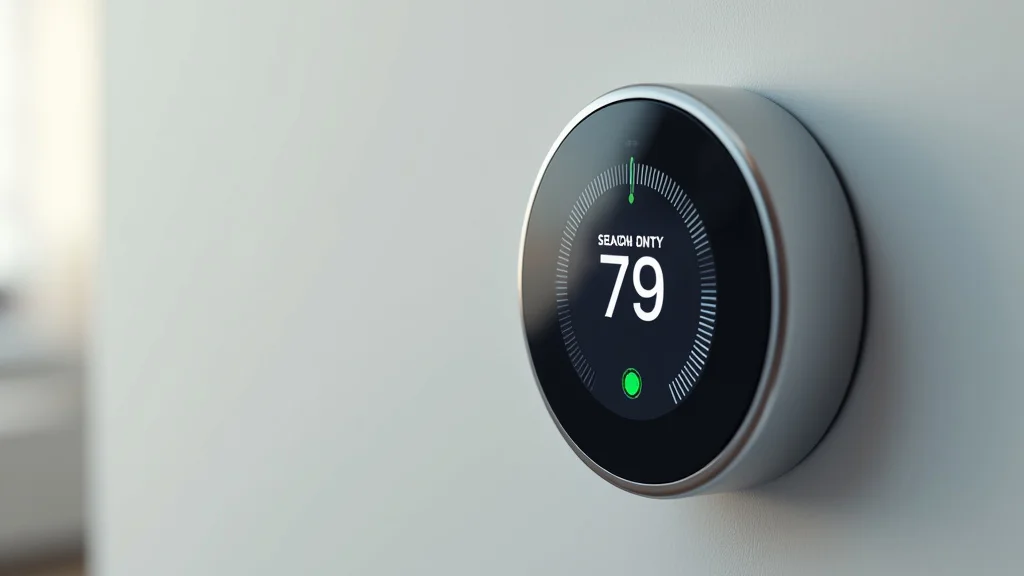
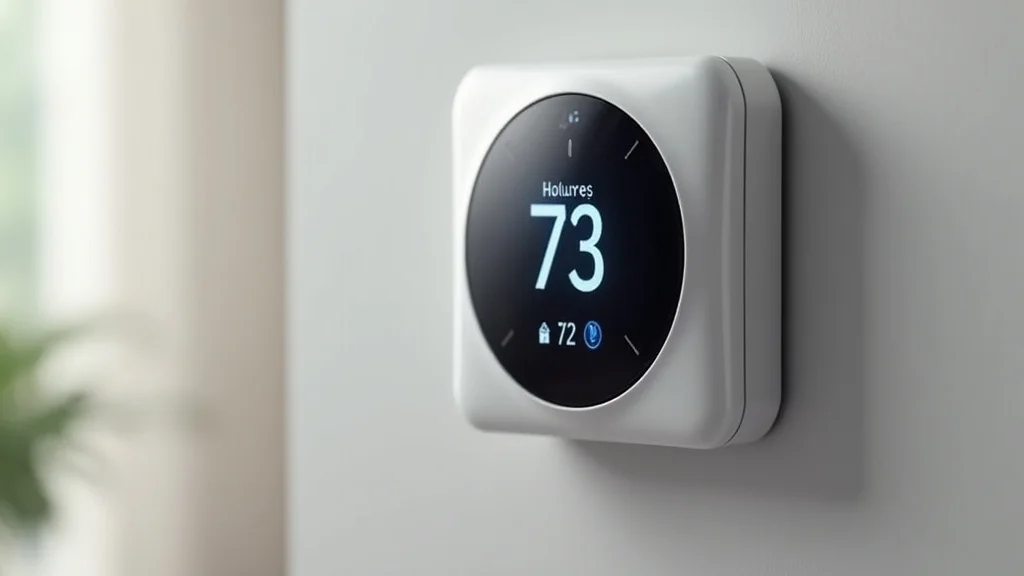
Picture this: You’re cozy on the couch, but the temperature is too high. Instead of getting up, you grab your phone and adjust the heat with a few taps. That’s the convenience of a smart thermostat. These devices can revolutionize your home’s climate control, but setting one up can seem a bit tricky at first. This post breaks down smart thermostat instructions clearly and simply, helping you optimize your home’s comfort while saving money on your energy bill. You’ll learn everything you need to know to get your thermostat up and running, and discover how to use its features to save energy. Get ready to gain control of your home’s temperature!
Key Takeaways
- Learn the basic components of a smart thermostat and how they work.
- Discover how to connect and configure your smart thermostat to your home’s HVAC system.
- Explore different programming options for customized heating and cooling schedules.
- Find out how to integrate your thermostat with other smart home devices.
- Understand how to troubleshoot common problems and maintain your smart thermostat.
- Gain insights into how smart thermostats can contribute to energy savings.
Getting Started With Your Smart Thermostat
The first step in setting up your smart thermostat is to understand its basic components. Most thermostats have a display screen, control buttons or a touchscreen, and a Wi-Fi module. The internal sensors measure the temperature, and the thermostat communicates with your HVAC system (heating, ventilation, and air conditioning) to adjust the airflow and temperature. They often come with accompanying apps, allowing for remote control and scheduling via your smartphone or tablet. Additionally, many devices integrate with voice assistants, allowing for hands-free adjustments. The physical installation is important, so this section guides you through the process step by step.
Unboxing and Initial Inspection
Unboxing your smart thermostat is an exciting first step. It is a good time to become familiar with the different components that come with the device. Begin by carefully opening the box and taking inventory of all the parts. You should find the thermostat unit itself, usually with a screen and control interface. Also, check for the wall plate, which is the part that attaches to your wall. There will be wires for your HVAC system. A user manual and quick start guide are also included, providing initial instructions. You may also find mounting hardware, such as screws and wall anchors. A common error is assuming all the necessary parts are present, so a detailed inspection upfront will save time and frustration.
-
Check for Missing Parts: Ensure you have all the components listed in the user manual. This includes the thermostat unit, wall plate, mounting screws, and any sensors or adapters. Missing parts can delay the installation.
A missing component can prevent you from setting up your device. This could be as simple as an adapter or screw needed to fix the device to the wall. Double-checking ensures all parts are present before you start.
-
Inspect for Damage: Examine the thermostat and other parts for any signs of damage. Cracks, dents, or loose parts can indicate a problem. Contact the manufacturer if you find any damage.
Even small imperfections can impact functionality. Inspecting for damage now prevents surprises and ensures you get the device working properly.
-
Read the Quick Start Guide: Briefly review the quick start guide to understand the basic setup steps and identify any specific instructions for your model.
The quick start guide is a good resource for the first setup steps. It provides essential information that helps get you started with setting up your device.
Tools You Might Need
Before installing your smart thermostat, gather the tools you will need. Having the right tools on hand will simplify the process and prevent delays. A screwdriver, both Phillips head and a flathead, is essential for removing and securing wires. Pliers or wire strippers are helpful for cutting and stripping wires if needed. You may also need a level to ensure your thermostat is mounted straight. A smartphone or tablet is required for connecting to Wi-Fi and using the thermostat’s app. Lastly, a multimeter might be helpful for testing wires if you have any questions.
-
Screwdrivers: You will need both Phillips head and flathead screwdrivers to remove and secure wires.
These are necessary for dealing with the screws holding the thermostat in place, as well as any screws that hold the wires.
-
Pliers and Wire Strippers: These are useful for cutting and stripping wires if you need to adjust them.
These tools can make working with the wires more accessible, especially if they are difficult to manage.
-
Level: To ensure the thermostat is mounted straight on the wall.
A level will help install the device properly.
-
Smartphone or Tablet: Required for connecting to Wi-Fi and using the thermostat’s app.
These tools are required to set up your device via the app.
Prepare for Old Thermostat Removal
The first step in any project is preparation. Before removing the old thermostat, turn off the power to your HVAC system at the circuit breaker. This is a critical safety step to prevent electrical shocks. Next, remove the faceplate of the old thermostat to reveal the wiring. Take a photo of the wiring setup before removing any wires. This photo will be an essential reference when connecting the new smart thermostat. Label each wire with the corresponding terminal letter (e.g., R, W, G, Y) using masking tape or labels. Disconnect the wires one at a time and remove the old thermostat base from the wall.
-
Turn Off the Power: This is an essential safety precaution to prevent electrical shocks during the installation.
It’s very important to prevent potential injuries. This step should never be skipped.
-
Take a Photo of the Wiring: This will be your reference when connecting the wires to the new smart thermostat.
Wiring can be confusing. Take a picture, so you can easily refer back to the existing setup.
-
Label the Wires: Use masking tape or labels to mark each wire with the corresponding terminal letter on your old thermostat (e.g., R, W, G, Y).
This labeling helps you identify where each wire should be connected on the new device.
Installing Your Smart Thermostat and Wiring
Once you’ve prepared, the next phase is to connect your smart thermostat. The actual wiring procedure can vary slightly depending on your HVAC system and the model of your smart thermostat. However, the general process involves connecting the wires from your HVAC system to the corresponding terminals on the new thermostat. Refer to your thermostat’s manual for specific instructions for your model. Ensure the wires are securely connected to the terminals. After wiring, mount the thermostat base to the wall. Attach the thermostat faceplate to the base, and restore power to the HVAC system at the circuit breaker. The next step is to connect to your Wi-Fi network and begin with the initial configuration.
Wire Connections
The core of installing a smart thermostat involves wiring. Before starting, consult your thermostat’s manual for specific instructions and diagrams. Match the wires from your HVAC system to the corresponding terminals on the smart thermostat. Common terminals include: R (power), W (heat), G (fan), Y (cooling), and C (common wire, needed for some smart thermostats). Make sure the wires are securely inserted into the terminals and tightened to prevent loose connections. If you have extra wires or unusual terminals, consult your thermostat’s manual or contact a professional.
-
R Wire (Power): This is usually a red wire and provides power to the thermostat.
This wire is a power source, essential for operating the thermostat and running your HVAC system. Common configurations include the Rc and Rh power terminals.
-
W Wire (Heat): This is typically a white wire and controls the heating function.
This wire tells your furnace to turn on and deliver warm air.
-
G Wire (Fan): This is usually a green wire and controls the fan.
This wire controls the fan, allowing you to circulate air throughout your home, whether heating or cooling.
Mounting the Smart Thermostat Base
Mounting the base involves securing the baseplate of your new thermostat to the wall where your old thermostat was. Use the provided screws and wall anchors to attach the base. Ensure the base is level before tightening the screws. If the existing holes are not suitable, you may need to drill new ones. Once the base is securely mounted, connect the wires to the thermostat terminals. After the wiring is complete, attach the thermostat unit to the base. This step completes the physical installation. It’s important to keep in mind, a proper, secure base provides an important point of reference.
-
Use Wall Anchors: If mounting to drywall, use the included wall anchors to provide a secure hold for the screws.
Wall anchors prevent screws from pulling out of drywall and ensure your thermostat stays firmly in place.
-
Ensure a Level Mount: Use a level to ensure the base is mounted straight on the wall.
A level mounting not only makes the thermostat look better, but also ensures proper functionality of the touch or button controls.
-
Secure Wiring: Once the base is mounted, make sure the wires are securely connected to the terminals before attaching the thermostat unit.
Loose wires can cause the thermostat to malfunction, so this step is critical for proper operation.
Powering Up and Testing
Once the wiring and mounting are complete, restore power to your HVAC system at the circuit breaker. This is when the smart thermostat should power up, displaying the home screen or start-up menu. Follow the on-screen instructions to set up the device, including connecting to your Wi-Fi network. Test the heating and cooling functions. Set the desired temperature and observe whether the HVAC system responds accordingly. If the system doesn’t respond correctly, check your wiring and consult the user manual or contact customer support for help. After these steps, you’ve completed the initial setup, and you can start to utilize the special features.
-
Restore Power: Flip the circuit breaker back on to provide power to the thermostat and HVAC system.
The thermostat should power up and start the initial setup process.
-
Connect to Wi-Fi: Follow the on-screen instructions to connect your thermostat to your home’s Wi-Fi network.
Wi-Fi connectivity is essential for remote control, scheduling, and accessing other advanced features.
-
Test Heating and Cooling: Set the thermostat to heat and cool modes and verify that the HVAC system responds accordingly.
Verify that your setup is working properly by using the temperature controls.
Configuring Your Smart Thermostat
After installing your smart thermostat, configuration is key. Configuration includes setting up your home network, setting the time and date, setting up the temperature display, and setting up schedules. A well-configured thermostat provides you with more control over your home’s climate. Different smart thermostats offer various settings. This section walks you through all the steps to configure your smart thermostat according to your specific needs. Follow the steps carefully to ensure your thermostat works correctly and you can fully utilize all its features. A good configuration helps you maximize your energy savings and improve your overall comfort.
Connecting to Wi-Fi and the App
Connecting your smart thermostat to Wi-Fi is crucial for remote control, programming, and accessing its advanced features. The process usually begins on the thermostat itself. The device will likely display a list of available networks. Select your home’s Wi-Fi network from the list and enter your network password when prompted. Once connected to Wi-Fi, download and install the corresponding mobile app for your thermostat on your smartphone or tablet. Open the app and follow the on-screen instructions to create an account or sign in. The app will guide you through the process of connecting your thermostat to your account. This setup allows you to monitor and adjust your thermostat from anywhere, giving you greater control over your home environment.
-
Locate the Network Settings: Find the Wi-Fi settings menu on your smart thermostat’s display.
This menu typically allows you to search for available Wi-Fi networks.
-
Enter Your Password: Select your home’s Wi-Fi network and enter your network password.
This allows your thermostat to connect to your home’s network.
-
Download the App: Download the app associated with your smart thermostat. You can typically find a link to the app in your thermostat’s user manual or on the manufacturer’s website.
The app is the primary interface for controlling and managing your thermostat remotely.
Setting Up a Schedule
One of the main benefits of a smart thermostat is its ability to create a schedule. A schedule allows you to automate the heating and cooling of your home based on your daily routine. Most thermostats allow you to set different temperatures for different times of the day and days of the week. For example, you can set the temperature higher when you’re away at work and lower when you’re sleeping. This can help save energy and reduce your energy bill. Most apps make setting up schedules simple and intuitive, often with a drag-and-drop interface. To get started, open the app, go to the scheduling settings, and customize the schedule to match your lifestyle and needs. Many thermostats learn your habits and adjust the schedule accordingly.
-
Access Scheduling Settings: Locate the scheduling options within your thermostat’s app.
The precise location varies by app, but it’s usually under a “Schedule,” “Program,” or similar menu option.
-
Set Temperature Preferences: For each time period (e.g., morning, afternoon, evening, night), set the desired heating and cooling temperatures.
Consider the times when you’re home, away, or sleeping. Ensure your comfort with a comfortable temperature.
-
Save and Review: After creating your schedule, save it and review it to ensure it fits your needs.
Making a review helps ensure your schedule is correct, and will provide an energy-efficient temperature management experience.
Customizing Settings
Beyond basic scheduling, most smart thermostats offer a variety of customization options. These settings allow you to refine the performance of the thermostat and tailor it to your needs. This can include features like temperature display (Fahrenheit or Celsius), display brightness, fan control settings, and alerts. Many thermostats have options for energy-saving modes. The settings usually are found within the app or the thermostat’s menu. Explore these settings to find what works best for your home and lifestyle. It is important to adjust the settings to match your personal preferences to maximize comfort and efficiency. It is important to explore all available customization options.
-
Temperature Display: Adjust the temperature display to your preferred unit (Fahrenheit or Celsius).
This ensures you can easily read and understand the temperature.
-
Display Brightness: Adjust the display brightness to make it easy to see during the day or night.
Brightness adjustments ensure visibility and prevent the display from being too distracting.
-
Fan Control: Set the fan to run automatically, continuously, or only when heating or cooling.
Different fan settings affect air circulation and energy use, so select the one that suits your needs.
Advanced Features and Integrations
Smart thermostat instructions often include details on advanced features. Many smart thermostats offer advanced features, such as geofencing, energy reports, and integration with other smart home devices. Geofencing uses your smartphone’s location to automatically adjust the temperature when you leave or return home. Energy reports provide insights into your energy consumption. Integration with smart home platforms like Apple HomeKit, Google Assistant, or Amazon Alexa allows for voice control and integration with other smart home devices. Understanding and utilizing these features enhances the functionality and value of your smart thermostat. This section helps you discover and use advanced functions that can enhance comfort, convenience, and energy savings.
Geofencing and Smart Home Integration
Geofencing and smart home integration represent advanced features that enable automation and expand the capabilities of your smart thermostat. Geofencing utilizes your smartphone’s location to automatically adjust the temperature settings based on whether you are at home or away. Integration with smart home platforms, like Apple HomeKit, Google Assistant, or Amazon Alexa, allows you to control your thermostat with voice commands and integrate it with other smart home devices. For example, you can set up a routine to turn off the lights and lower the temperature when you say “good night.” These integrations provide more convenience. They can also enhance the overall efficiency of your home. Enabling these functions typically involves setting up your thermostat with the associated app and enabling the integration within the settings. Proper setup requires following the specific instructions provided by your thermostat model.
-
Enable Geofencing: Enable geofencing in your thermostat’s app and grant the app location permissions.
The app will use your location to determine if you are home or away.
-
Integrate with Smart Home Platforms: Connect your thermostat to smart home platforms like Google Home, Apple HomeKit, or Amazon Alexa through the platform’s app.
This integration lets you control your thermostat with voice commands and automation.
-
Create Routines and Automations: Use your smart home platform to create routines and automations that include your thermostat.
You can set your thermostat to respond to other smart home devices or events, like turning off lights or locking doors.
Energy Reports and Usage Analysis
Most smart thermostats provide energy reports and usage analysis, allowing you to track your energy consumption and identify opportunities for savings. These reports typically display data on your heating and cooling usage over time, often broken down by day, week, or month. The reports might include information on the hours your system was running, the average temperatures, and estimated energy costs. You can often see this information in your thermostat’s app. Understanding the information provides insight into your heating and cooling habits. This can help you to optimize your schedules, identify any issues. Regular review of the energy reports can help you make adjustments to your thermostat settings to improve energy efficiency and reduce your energy bills. Using your energy reports for reference is a great strategy to save.
-
Access Energy Reports: Find the energy reports section in your thermostat’s app.
Energy reports are usually found within a “History,” “Usage,” or similar menu option.
-
Review Usage Data: Examine the data provided in the energy reports, including energy consumption, run times, and temperature settings.
Reviewing the usage data helps you understand how your heating and cooling habits affect your energy bills.
-
Identify Trends and Adjust Settings: Identify any trends in your energy usage and make adjustments to your schedule or settings accordingly.
Making adjustments based on your usage data helps to optimize your energy consumption and reduce waste.
Troubleshooting and Maintenance
Even with advanced features, issues can arise. Knowing how to troubleshoot and maintain your smart thermostat is vital to ensure its continued performance. Common issues include Wi-Fi connection problems, inaccurate temperature readings, and unresponsive controls. Start troubleshooting by checking the Wi-Fi connection and restarting the thermostat. Consult the user manual or online resources for model-specific troubleshooting tips. Regularly check the air filter for your HVAC system. A clean air filter improves the system’s efficiency and helps the thermostat operate correctly. Following basic troubleshooting and maintenance procedures will help you keep your smart thermostat running smoothly and efficiently. Maintenance is crucial to maximizing the life span of your device.
-
Wi-Fi Connection Issues: If your thermostat loses its Wi-Fi connection, check your home network and reboot the thermostat.
Restarting the system solves most connection problems.
-
Temperature Inaccuracy: If the temperature readings appear incorrect, calibrate the thermostat using the settings in the app.
Calibrating ensures accurate temperature monitoring.
-
Air Filter Maintenance: Regularly check and replace the air filter in your HVAC system.
The air filter affects the performance of your HVAC system and could affect the readings in your thermostat.
Common Myths Debunked
Myth 1: Smart Thermostats are Too Difficult to Install
Many people believe that installing a smart thermostat is a complex task best left to professionals. The truth is that most smart thermostats are designed for easy installation, with detailed smart thermostat instructions. Many models have step-by-step guides and videos. The process primarily involves removing the old thermostat, connecting the wires, and mounting the new device. If you can follow basic instructions and understand the wiring of your current thermostat, you can likely install a smart thermostat yourself. If you are not comfortable with electrical work, it is always a great idea to hire a professional.
Myth 2: Smart Thermostats Only Save Money in Specific Climates
Some people think smart thermostats are only helpful in certain climates. Smart thermostats can provide energy savings, regardless of climate. While the amount of savings can depend on your local climate and energy costs, the ability to control your home’s temperature more precisely and set schedules allows for greater energy efficiency. Whether you live in a hot or cold climate, using a smart thermostat helps to prevent energy waste. Even small adjustments to your temperature can accumulate over time and reduce your energy bill.
Myth 3: Smart Thermostats are Not Secure and Can Be Hacked Easily
Concerns about security are another common myth. Modern smart thermostats use advanced security measures to protect your data and prevent unauthorized access. Manufacturers use encryption to protect your network and data. It is wise to secure your home Wi-Fi network with a strong password. You should update your thermostat’s firmware regularly. These measures reduce security risks. While no system is perfectly secure, smart thermostats are generally safe and secure if you follow basic security practices.
Myth 4: Smart Thermostats Require Professional HVAC Systems
Some believe that smart thermostats are only suitable for modern HVAC systems. Most smart thermostats are designed to be compatible with a wide range of HVAC systems. This includes many furnaces, air conditioners, and heat pumps. Compatibility is essential. Before purchasing, verify your system’s compatibility with the specific model you are considering. You can find this information on the product packaging or the manufacturer’s website. If your system is compatible, you can likely start right away.
Myth 5: Smart Thermostats Are Expensive and Not Worth the Cost
It is true that the initial cost of a smart thermostat might be higher than a standard model. The value comes in the long run. Over time, smart thermostats can lead to savings on energy bills. The amount of money you save varies on your usage, but the cost can offset the initial investment. The convenience of remote control and customization also adds value. When compared to the benefits of convenience and savings, most users find the cost of a smart thermostat is worthwhile.
Frequently Asked Questions
Question: Can I install a smart thermostat myself?
Answer: Yes, in most cases, you can install a smart thermostat yourself. The installation process typically involves basic wiring tasks, which you can manage if you can follow instructions carefully. Always turn off the power at the circuit breaker before you begin.
Question: Do I need a C-wire for my smart thermostat?
Answer: A C-wire (common wire) is needed for some smart thermostats to provide a consistent power supply. If your old thermostat has a C-wire, connect it to the corresponding terminal on the new smart thermostat. If you don’t have a C-wire, some smart thermostats can work without it, while others may require an adapter.
Question: How do I connect my smart thermostat to Wi-Fi?
Answer: The process of connecting to Wi-Fi involves selecting your home’s network from the thermostat’s settings menu, entering your Wi-Fi password, and then connecting. You’ll also likely need to use the thermostat’s app on your smartphone to complete the setup process.
Question: How can I save money with a smart thermostat?
Answer: You can save money by setting up a schedule that adjusts the temperature based on your daily routine. By setting the temperature higher when you’re away and lower when you’re asleep, you can reduce energy waste and lower your energy bill. The more you control your thermostat, the more you save.
Question: What happens if my smart thermostat loses its Wi-Fi connection?
Answer: If your smart thermostat loses its Wi-Fi connection, it will typically continue to function, but you will lose the ability to control it remotely via the app. The thermostat will likely follow the last schedule it received. The device can still function as a basic thermostat until the Wi-Fi connection is restored.
Final Thoughts
You now have a complete guide to understanding and using smart thermostat instructions. You’ve covered all the key steps, from unboxing and wiring to advanced features. You are ready to start enjoying the convenience and energy-saving benefits of this essential device. Remember, proper installation is key to your device’s function. Once installed, take time to explore the app. Use the features to create schedules and customize settings. This helps you to maximize your comfort and savings. It is a good idea to monitor your energy usage. By integrating geofencing and other features, you can enhance the efficiency. This is a powerful step towards a smart home, providing more control and contributing to energy savings. Take the steps you learned to start enjoying the control and efficiency of a smart thermostat today.