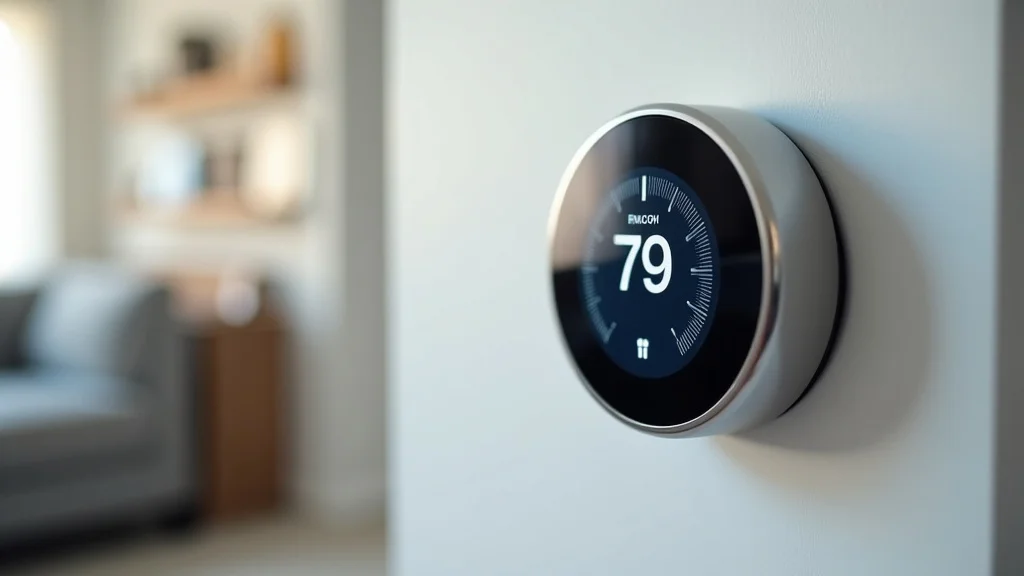
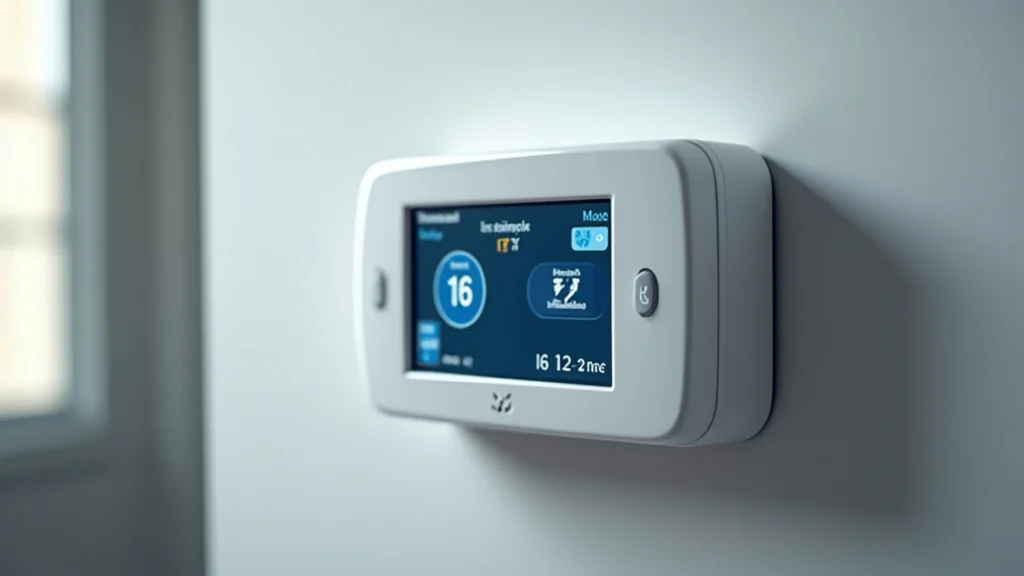
Remember that time your heating bill felt like a mortgage payment? Or how about constantly adjusting your thermostat because your house felt like a sauna in the afternoon? Many homeowners face these frustrating situations. But what if there was a way to gain better control over your home’s temperature, save money, and simplify your life? This guide explores everything you need to know about smart thermostat installation. You’ll learn the benefits of these devices, the steps for a successful setup, and how to optimize them for maximum efficiency. By the end, you’ll be able to improve your comfort and lower your energy bills. This post will help you gain control over your home’s energy use and become more comfortable and efficient.
Key Takeaways
- Smart thermostats offer advanced energy-saving features compared to older models.
- Proper smart thermostat installation can be easily completed with basic electrical knowledge.
- Compatibility checks are essential to ensure the smart thermostat works with your HVAC system.
- Optimizing settings and using smart features can significantly reduce your energy consumption.
- Troubleshooting common issues ensures optimal performance and homeowner satisfaction.
- Regular maintenance will prolong the life of your device and maintain energy savings.
Why Upgrade to a Smart Thermostat?
Traditional thermostats, while functional, lack the intelligence and adaptability of their modern counterparts. Smart thermostats learn your heating and cooling habits, adjust automatically, and allow for remote control via a smartphone or tablet. Think about being able to adjust the temperature before you get home from work or setting up a schedule that automatically lowers the temperature while you are asleep or away. These features translate into significant energy savings and increased comfort. The initial investment in a smart thermostat installation pays off over time, making it a wise choice for most households.
Energy Efficiency Benefits
One of the primary advantages of upgrading to a smart thermostat is enhanced energy efficiency. These devices are equipped with features that allow you to customize your heating and cooling schedules, which can significantly reduce your energy consumption. You can program the thermostat to automatically lower the temperature when you are away from home or asleep, saving energy without sacrificing comfort. Furthermore, these thermostats can detect occupancy and adjust the temperature accordingly, further optimizing energy use. Many models also offer detailed energy usage reports, providing valuable insights into your consumption patterns and helping you make informed decisions about your energy usage. Consider the fact that heating and cooling can account for over 50% of a home’s energy consumption, a smart thermostat offers significant savings.
- Adaptive Learning: Smart thermostats learn your habits and preferences to optimize temperature settings. This automation minimizes energy waste. These devices analyze your heating and cooling cycles to determine when to preheat or cool your home, leading to efficient energy use.
- Geofencing: Geofencing allows the thermostat to adjust the temperature based on your location. It can automatically turn off the system when you leave home and turn it back on as you approach, optimizing energy use.
- Programmable Schedules: You can create customized schedules that match your lifestyle, automatically adjusting temperatures based on the time of day, day of the week, or even specific activities.
- Energy Reports: Many smart thermostats provide energy usage reports that show how much energy you are using and where you can improve efficiency.
- Integration with Smart Home Systems: Smart thermostats often integrate with other smart home devices, allowing for unified control and automation. For example, your thermostat could work with your smart lights.
A recent study by the U.S. Department of Energy found that smart thermostats could save homeowners an average of 10-12% on their heating and cooling costs. This translates to substantial savings over the lifespan of the device. These savings come from reduced energy consumption due to efficient operation and smart programming.
Enhanced Home Comfort
Beyond energy savings, smart thermostats significantly improve home comfort. With precise temperature control and smart features, they create a more pleasant living environment. You can set the exact temperature you desire and maintain consistent comfort throughout your home. Furthermore, the remote access capability allows you to make adjustments from anywhere, ensuring your home is at the perfect temperature when you arrive. Imagine being able to fine-tune your home’s temperature from your office to guarantee your comfort upon returning home. They allow you to easily control and adjust the temperature, providing constant comfort regardless of your schedule.
- Precise Temperature Control: Smart thermostats offer greater accuracy in temperature settings compared to traditional thermostats, ensuring consistent comfort.
- Remote Access: Control your home’s temperature from anywhere using your smartphone, tablet, or computer.
- Zone Control Compatibility: Some smart thermostats can work with zone control systems, allowing you to set different temperatures in different areas of your home.
- Comfort Scheduling: Create custom schedules to match your daily routines and personal preferences for optimal comfort.
- Air Quality Monitoring: Certain smart thermostat models also monitor air quality and provide data on indoor air pollutants.
Preparing for Smart Thermostat Installation
Before beginning the smart thermostat installation, proper preparation is essential. This includes gathering the necessary tools, checking compatibility with your existing HVAC system, and turning off the power to ensure safety. Taking these steps will help you avoid problems during the installation process and ensure the thermostat functions correctly. Taking time to prepare makes the installation easier and significantly increases your likelihood of success.
Gathering Your Tools and Supplies
Having the right tools and supplies on hand will make the installation process smoother and more efficient. While the exact tools may vary slightly depending on the thermostat model and your existing setup, the following items are generally needed. Always consult your thermostat’s manual for specific tool requirements and safety instructions. Some thermostats come with all the necessary hardware in the box. Check the box to make sure you have everything before starting.
- Screwdriver: A screwdriver is necessary for removing the old thermostat and attaching the new one. Ensure you have both Phillips-head and flat-head screwdrivers.
- Wire Strippers: Wire strippers are important to strip the insulation off the wires if they need to be trimmed or reconnected.
- Level: A level can help ensure the thermostat is mounted straight on the wall for a professional appearance.
- Drill (Optional): If you need to drill new holes for mounting the thermostat, a drill will be required.
- Pencil: A pencil is handy for marking the locations of screw holes.
- Wire Labels: Use the labels that came with your new smart thermostat kit, or use masking tape and a pen to label the wires. This will prevent confusion during the installation process.
- Smartphone or Tablet: Your smartphone or tablet will be used to connect the thermostat to your home’s Wi-Fi network and control its features.
- Your Smart Thermostat: Make sure you have the new thermostat and all of its included components.
- Owner’s Manual: Keep your thermostat’s manual handy. It contains specific instructions and diagrams for your model.
Checking System Compatibility
Before purchasing a smart thermostat, confirm that it is compatible with your HVAC system. Incompatible devices will not function correctly and may cause damage. Most smart thermostats are compatible with the majority of HVAC systems, but there are certain exceptions. Checking for compatibility beforehand ensures a smooth installation and avoids any potential issues. If you are unsure, consult a professional to ensure that your new device will function properly with your existing equipment.
- HVAC System Type: Confirm your system is compatible. Most smart thermostats are compatible with single-stage, multi-stage, and heat pump systems.
- Wiring Configuration: Check the wiring. Inspect the wires connected to your current thermostat and note the wire labels (e.g., Rh, W, Y, G, C). Match these labels with the compatibility chart in the new thermostat’s manual.
- Voltage: Most smart thermostats work with low-voltage systems (24 volts). Check your existing thermostat’s specifications to confirm the voltage. If your system is line-voltage, special thermostats are required.
- Number of Wires: Most smart thermostats support a standard number of wires (typically five). However, some advanced systems may have more. Your smart thermostat manual will list all the types of configurations it works with.
- Wi-Fi Network: Ensure your home has a reliable Wi-Fi network. The smart thermostat will connect to this network for remote access and smart features.
If you have any doubts about compatibility, consult your HVAC system’s manual or a qualified HVAC technician. They can assess your system and ensure that the chosen thermostat is appropriate.
Turning Off the Power
Safety should be your top priority. Before you start removing your old thermostat, turn off the power to your HVAC system. This helps prevent electrical shocks or damage to your equipment. You can turn off the power at the circuit breaker that controls your HVAC system. Always double-check that the power is off by testing the wires with a non-contact voltage tester before beginning the smart thermostat installation. If you are unsure which breaker controls your HVAC system, refer to your home’s electrical panel or consult an electrician.
Smart Thermostat Installation Steps
The actual installation process of a smart thermostat installation is fairly simple, but it is important to follow the steps in order. Take your time, pay close attention to detail, and consult your smart thermostat’s manual for specific instructions. Proper installation is critical for the thermostat to function correctly and provide all the features it offers. When you are done, your new smart thermostat will offer better control and help you save money.
Removing the Old Thermostat
After turning off the power and gathering your tools, remove your old thermostat. This involves disconnecting the wires and detaching the thermostat from the wall. Take your time and make sure you understand the wiring configuration before removing the old thermostat. Properly documenting the wiring is very important to make sure the new device will function correctly.
- Remove the Cover: Gently remove the cover from your existing thermostat. Many covers snap off or are secured by screws.
- Photograph the Wires: Take a picture of the wiring connections before you disconnect any wires. This will serve as a reference.
- Label the Wires: Carefully label each wire with the corresponding terminal letter on your old thermostat (e.g., Rh, W, Y, G, C). Most smart thermostats include labels in the box, but you can also use masking tape.
- Disconnect the Wires: Unscrew the terminals and carefully detach the wires from the old thermostat. Do not allow the wires to fall back into the wall.
- Remove the Base: Unscrew and remove the base of the old thermostat from the wall.
Wiring the Smart Thermostat
Next, it’s time to connect the wires to the new smart thermostat. Match the wires from your old thermostat to the corresponding terminals on the new one. Refer to the wiring diagram in your smart thermostat’s manual, and double-check your work to ensure all connections are accurate. Properly connecting the wires is necessary for the smart thermostat to function correctly.
- Mount the Base: Attach the base of the new thermostat to the wall using screws, ensuring it is level.
- Connect the Wires: Insert the labeled wires into the corresponding terminals on the smart thermostat, using the wiring diagram in your manual as a guide.
- Secure the Wires: Tighten the terminal screws to secure the wires in place. Make sure the wires are securely connected to the terminals.
- Double-Check Connections: Review all connections to ensure they match your original photograph and the wiring diagram.
- Attach the Thermostat: Carefully attach the smart thermostat to its base, following the manufacturer’s instructions.
Connecting to Wi-Fi and Setting Up the App
Once the wiring is complete, connect the thermostat to your home’s Wi-Fi network and configure the app. This is how you will control the thermostat remotely and access its smart features. The steps for connecting to Wi-Fi and setting up the app will vary slightly depending on the smart thermostat model. Typically, the smart thermostat will guide you through the process, and the app will provide step-by-step instructions. Now is when the benefits of your smart thermostat installation truly come to life.
- Power On the Thermostat: Turn the power back on at the circuit breaker. The thermostat should power up.
- Connect to Wi-Fi: Follow the instructions in the thermostat’s manual to connect it to your home’s Wi-Fi network.
- Download the App: Download the corresponding app for your smart thermostat from the App Store or Google Play.
- Create an Account: Create an account within the app and follow the instructions to link the thermostat to your account.
- Configure Settings: Customize the settings in the app, such as setting up schedules, defining temperature preferences, and enabling smart features.
Troubleshooting Common Smart Thermostat Installation Issues
Sometimes, problems come up, but they can usually be resolved with simple steps. If your smart thermostat is not working as expected, there are several troubleshooting steps you can take. If the problem persists, consult your manual, contact the manufacturer’s customer support, or seek help from a professional HVAC technician. Being able to solve issues helps you get the most out of your smart thermostat installation.
No Power or Display Problems
If your smart thermostat does not power on or the display is not working, begin with a few basic checks. Always ensure the power is connected correctly, and the circuit breaker is turned on. Also, make sure all the wiring connections are secure and have not come loose during the installation. Simple mistakes can often cause the issues described below.
- Check the Power Source: First, make sure the circuit breaker for your HVAC system is turned on. Confirm the thermostat is receiving power.
- Wiring Errors: Double-check the wiring connections to ensure they are properly connected and secure.
- C-Wire Issue: The C-wire (common wire) provides power to the thermostat. If you are having power issues, verify that the C-wire is correctly connected. If you don’t have a C-wire, you may need a separate power adapter.
- Battery Check: Some thermostats have batteries. If your thermostat has a low-battery indicator,
- Factory Reset: If none of the above fixes the issue, try a factory reset to restore the thermostat to its default settings. Consult your manual for reset instructions.
Connectivity and Wi-Fi Problems
If your smart thermostat does not connect to your Wi-Fi network, it might lose some of its best features. Connectivity problems can be frustrating, but many are easily fixed. Many times, the issue is related to your home network or the placement of your thermostat. By going through some basic steps, you can typically fix your Wi-Fi problems.
- Network Name and Password: Verify that you have entered the correct Wi-Fi network name and password during setup. Small errors can prevent connection.
- Wi-Fi Signal Strength: Check the Wi-Fi signal strength at the location of the thermostat. A weak signal may cause connectivity issues. Consider moving your thermostat closer to the router or using a Wi-Fi extender.
- Router Issues: Restart your router to resolve connectivity problems. Often, this simple step fixes the issue.
- Thermostat Placement: Avoid placing your thermostat near large metal objects or other sources of interference, which can disrupt the Wi-Fi signal.
- Firewall or Security Settings: Make sure your router’s firewall or security settings are not blocking the thermostat’s connection.
Heating or Cooling System Malfunctions
If your heating or cooling system is not working correctly after the smart thermostat installation, examine the wiring and the settings on the new thermostat. Make sure the thermostat is configured correctly to control your specific type of HVAC system. Issues with the heating or cooling system can be a sign of a larger problem, so you want to ensure your device is configured correctly.
- Wiring Errors: Incorrect wiring is the most common cause of heating or cooling malfunctions. Re-examine the wiring connections against the wiring diagram to ensure everything is connected correctly.
- System Configuration: Make sure the thermostat is configured for your type of HVAC system (e.g., gas, electric, heat pump).
- Calibration: Calibrate the thermostat to match the temperature readings with a trusted thermometer.
- Mode Settings: Make sure the thermostat is set to the correct mode (e.g., heat, cool, auto).
- System Compatibility: Ensure the smart thermostat is fully compatible with your HVAC system. In some cases, there might be incompatibilities that affect system performance.
Optimizing Your Smart Thermostat for Maximum Efficiency
After your smart thermostat installation is done, you can maximize energy savings and comfort by optimizing its settings and utilizing its smart features. Learning how to best configure your thermostat to match your lifestyle will ensure that you are getting the most from your investment. Smart thermostats offer many features to enhance efficiency and provide comfort; understanding these features is the key to maximizing benefits.
Creating a Personalized Schedule
Create a schedule that aligns with your daily routines and preferences. The objective is to automatically adjust the temperature based on your activities and schedule to maximize energy efficiency. A personalized schedule takes into account the fact that your home is used in a specific way; this will prevent the unnecessary consumption of energy. A well-designed schedule helps you maintain a comfortable environment while saving money.
- Set Different Temperatures for Different Times: Set a lower temperature when you are asleep or away from home and a higher temperature when you are home and active.
- Consider Your Daily Routine: Adjust the schedule to match your work hours, commute times, and other activities.
- Use Preheating and Pre-cooling: Many thermostats have features that automatically preheat or pre-cool your home before you arrive.
- Seasonal Adjustments: Modify your schedule seasonally to reflect changing weather conditions.
- Adjust Temperature in Small Increments: Experiment with slight temperature adjustments to find the right balance between comfort and energy savings.
Using Smart Features for Savings
Take advantage of your smart thermostat’s features for additional energy savings. Features such as geofencing and smart home integration can help you further automate your energy management and reduce your bills. These are meant to allow you to make smart adjustments to your thermostat, which, in turn, helps you save money and improve efficiency. Explore the full range of features your thermostat offers and incorporate these options into your energy-saving strategies.
- Geofencing: Enable geofencing to automatically adjust the temperature when you leave or arrive at home.
- Occupancy Sensors: Use occupancy sensors to detect if you are in the room and adjust temperatures.
- Smart Home Integration: Connect your thermostat to other smart home devices for enhanced automation.
- Energy Reports: Review energy reports to monitor your consumption patterns and identify areas for improvement.
- Holiday Mode: Many thermostats offer a vacation mode, which lets you set a consistent energy-saving temperature while you are away.
Monitoring and Maintaining Your Device
Regular monitoring and maintenance will keep your smart thermostat working efficiently and ensure its longevity. Regularly reviewing the energy reports, as well as checking for updates, will ensure that your thermostat continues to provide the benefits for which it was designed. Periodic maintenance will help you prevent any problems from developing and preserve the device’s functionality. This will ensure your device functions well for many years.
- Monitor Energy Usage: Regularly review your energy usage reports to see how much energy you’re using.
- Check for Updates: Ensure that your smart thermostat’s software is up to date to get the newest features and improvements.
- Clean the Thermostat: Dust your thermostat occasionally to prevent debris from affecting its performance.
- Check Batteries: If your thermostat uses batteries, replace them when needed.
- Inspect Wiring: Periodically examine the wiring connections to ensure they are secure and free from corrosion.
According to the Environmental Protection Agency (EPA), even a 1-degree shift in your thermostat setting can result in a 3% reduction in your heating and cooling costs. The savings gained by this simple step can add up over time.
Common Myths Debunked
There are some common misconceptions about smart thermostats. Knowing the truth will help you make a fully informed decision and get the most from your investment. Understanding these facts ensures you fully leverage the advantages of a smart thermostat.
Myth 1: Smart Thermostats Are Difficult to Install
In many cases, the smart thermostat installation is straightforward, especially if you can
Myth 2: Smart Thermostats Don’t Save Money
The energy-saving features of smart thermostats, such as programmable schedules, geofencing, and adaptive learning, can substantially reduce your energy costs over time. The ability to monitor and adjust your home’s temperature will lead to significant savings. Many users find their smart thermostat can pay for itself in just a few years.
Myth 3: Smart Thermostats Are Not Compatible with My Home
Most smart thermostats are compatible with the majority of HVAC systems, including single-stage, multi-stage, and heat pump systems. Checking the thermostat’s compatibility chart can confirm if it is appropriate for your particular setup. While compatibility issues can occur, they are uncommon and typically easy to resolve.
Myth 4: Smart Thermostats Are Difficult to Use
Smart thermostats come with intuitive user interfaces. They can be controlled using apps on your smartphone or tablet. The ability to easily adjust your home’s temperature, set up schedules, and monitor your energy usage is designed to be user-friendly.
Myth 5: Smart Thermostats Aren’t Secure
Smart thermostats use secure Wi-Fi connections to protect your data and privacy. Many manufacturers implement encryption and other security measures to safeguard against unauthorized access. Manufacturers update their devices to fix any security problems, keeping your device safe and sound.
Frequently Asked Questions
Question: Can I install a smart thermostat myself?
Answer: Yes, many homeowners can easily install a smart thermostat by following the instructions in the manual. However, if you are not comfortable with electrical work, it’s best to hire a professional.
Question: Do I need a C-wire for a smart thermostat?
Answer: The C-wire (common wire) is usually needed for most smart thermostats, as it provides continuous power. But, some thermostats can operate without one, using batteries or other methods.
Question: Can a smart thermostat work with multiple zones?
Answer: Yes, some smart thermostats are compatible with multi-zone systems, providing the ability to control different zones in your home.
Question: How long does a smart thermostat last?
Answer: Smart thermostats typically have a lifespan of 5-10 years, depending on the model and how well you maintain it.
Question: How do I choose the best smart thermostat for my home?
Answer: When choosing a smart thermostat, consider compatibility with your HVAC system, the features you desire, and your budget.
Final Thoughts
From energy savings to improved home comfort and convenience, a smart thermostat installation is a solid investment. The installation process is accessible for most homeowners, provided you carefully follow the instructions and take the necessary safety precautions. By optimizing your settings and making use of the smart features, you can significantly reduce your energy costs and enhance your comfort. Make a point of experimenting with different schedules and settings, and you will learn how to best take advantage of your new smart thermostat. You will have a more energy-efficient and comfortable living space.