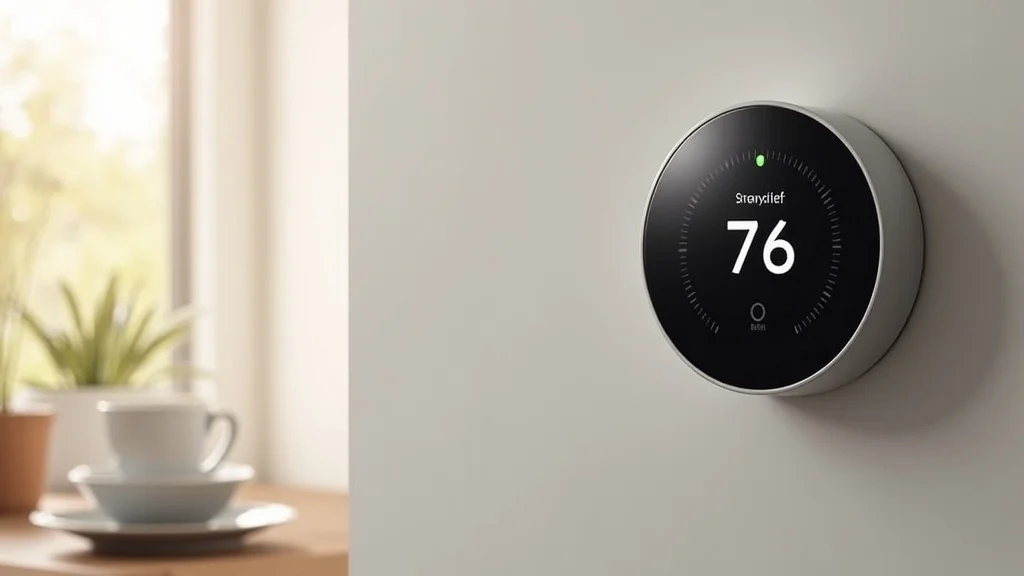
Picture this: It’s a chilly evening, and you arrive home ready to relax. You reach for the thermostat, but it’s a basic model, offering little control. Wouldn’t it be great to have a smarter system? Upgrading to a smart thermostat 2 wire heat only setup can provide that convenience. This post will show you how to easily update your system. You’ll explore the advantages of a smart thermostat, learn installation steps, and discover how to overcome common problems. By the end, you’ll be equipped to improve your home’s comfort and efficiency, gaining valuable control over your heating system.
Key Takeaways
- Learn the basics of smart thermostats compatible with 2-wire systems.
- Understand the installation process and necessary tools.
- Discover how to troubleshoot common issues during setup.
- Explore the benefits of using a smart thermostat.
- Find out about energy-saving features.
- Get expert advice on choosing the best model for your needs.
Understanding Smart Thermostats and 2-Wire Systems
Before jumping into installation, it’s key to grasp what a smart thermostat is and how it works with a 2-wire system. Smart thermostats go beyond simple temperature adjustments. They provide features like remote control via a smartphone app, energy usage tracking, and integration with other smart home devices. 2-wire systems, often found in older homes, are straightforward, using just two wires to control the heating. They are typically used for baseboard heaters, radiant floor heating, or older furnaces. This simplicity makes them a good choice for some smart thermostats.
What Makes a Smart Thermostat Smart?
A smart thermostat is packed with features that improve your home’s heating and cooling control. These thermostats usually have built-in Wi-Fi, allowing you to control them remotely. You can adjust the temperature from anywhere using your smartphone or tablet. They learn your habits and preferences, creating schedules to maintain your desired temperature automatically. Many smart thermostats also offer energy-saving features, which can help you lower your energy bills. They often integrate with other smart home devices, allowing for a connected experience. They monitor energy use, giving you insights into your consumption patterns, enabling you to make more efficient choices.
- Remote Control: Adjust settings from anywhere using a smartphone app.
- Learning Capabilities: Automatically adjust settings based on your daily routine.
- Energy Efficiency: Optimized heating schedules to save energy and reduce costs.
- Smart Home Integration: Connect with other smart devices for a seamless experience.
This allows you to control your heating system no matter where you are. Going home early? Turn up the heat before you arrive. Forgot to adjust the temperature before leaving? No problem, just use your phone.
Smart thermostats learn your heating preferences over time. They will start heating your home before you get home, and they can automatically lower the temperature at night or when you are away.
By learning your habits and adjusting temperatures accordingly, smart thermostats can cut down on wasted energy. They ensure your home is only heated when needed, reducing your utility bills.
Many smart thermostats can link with voice assistants like Amazon Alexa or Google Assistant. This allows you to control your heating with voice commands. They can also work with other devices in your home.
The Basics of 2-Wire Heating Systems
2-wire heating systems are a simple way of heating a home. They have two wires that carry the electrical current to turn the heater on and off. There isn’t a complex control system, and these systems are often found in older homes. Usually, these systems control baseboard heaters, radiant floor heating, or furnaces. Because of their simplicity, they’re typically easy to work with. These systems typically don’t have a separate wire for the fan; therefore, they only control the heating element itself.
- Simplicity: Only two wires are needed for operation, making them easy to troubleshoot.
- Compatibility: Works well with a range of heating types, including baseboard heaters.
- Basic Functionality: Control heating on/off and temperature levels.
- Voltage Requirements: Usually run on 24V or line voltage (120V or 240V).
The simplicity of these systems means that installation and maintenance are usually straightforward. The absence of multiple wires minimizes the chance of errors during installation.
2-wire systems are flexible and can work with various heating sources. This makes it an option for many homes, no matter the type of heating system already in place.
The main task of a 2-wire system is to start or stop the heating and set temperature levels. They offer limited advanced features compared to more modern systems, which makes them easy to replace.
It’s important to know the voltage of your system before picking a smart thermostat. Verify the voltage before starting the installation, as this information is key to your safety and the thermostat’s compatibility.
Choosing the Right Smart Thermostat for 2-Wire Heat Only
Picking the right smart thermostat is an important step. You’ll need one that works with a 2-wire system and meets your needs. Look for models made for compatibility and easy installation. Some models require a “C-wire” (common wire) or a power adapter if one isn’t available. Check the technical details to make sure the thermostat can handle the voltage of your heating system. Reviews from other users will help you evaluate performance and ease of use. Choosing the correct thermostat ensures a successful and enjoyable experience.
Key Features to Consider
When selecting a smart thermostat, certain features are essential. These features will improve your experience and make your system more effective. Make sure the thermostat is compatible with 2-wire systems. Check for Wi-Fi connectivity to enable remote control. Look for energy-saving functions that automatically adjust temperatures to reduce energy use. Consider ease of installation and setup. Evaluate the thermostat’s compatibility with other smart home systems, so all your devices will work together seamlessly.
- 2-Wire Compatibility: Make sure the thermostat is made for 2-wire systems.
- Wi-Fi Connectivity: Essential for remote control and smart features.
- Energy-Saving Features: Look for schedules, geofencing, and other energy-efficient settings.
- Ease of Installation: Choose a model with a simple setup process.
- Smart Home Integration: Check for compatibility with existing smart home platforms (Alexa, Google Assistant).
The most important thing is that the thermostat works with your existing setup. Check the product details to confirm compatibility before purchasing. This will prevent headaches and ensure a smooth installation.
Wi-Fi lets you control your thermostat from your smartphone. This allows you to adjust the temperature from anywhere. It also allows you to use smart features, such as scheduling.
Energy-saving features help you lower your energy bills. They often include learning your habits and automatically adjusting temperatures to save energy. Consider thermostats that automatically adjust when you are away from home.
Easy installation makes the upgrade less complicated. Look for thermostats with clear instructions. Some models also provide installation guides within their apps.
If you already use other smart home devices, choose a thermostat that integrates with them. Compatibility allows you to control your heating system using voice commands. It makes your home automation more effective.
Popular Smart Thermostat Models for 2-Wire Systems
Several smart thermostat models work well with 2-wire systems. The Nest Thermostat E is known for its simple design and easy installation. The Ecobee Lite is known for energy efficiency and easy setup. Honeywell also provides smart thermostats that are compatible. Research different models to find one that fits your needs. Compare features, read reviews, and check for any special requirements. Selecting the correct model ensures both performance and ease of use.
| Thermostat Model | Key Features | Compatibility |
|---|---|---|
| Nest Thermostat E | Easy install, simple design, good value | 2-wire systems with a C-wire adapter option |
| Ecobee Lite | Energy-saving features, remote sensor support, user-friendly interface | 2-wire, requires C-wire or power adapter |
| Honeywell Home T5/T6 | Programmable schedules, geofencing, compatibility with voice assistants | Typically needs a C-wire, check specifications |
Installing Your Smart Thermostat for 2 Wire Heat Only
Installing your smart thermostat 2 wire heat only requires care and attention to safety. Always turn off the power at the breaker box before starting work. After removing your old thermostat, label the wires. Follow the manufacturer’s instructions for wiring the new thermostat. Make sure to double-check all connections. Once the wiring is complete, turn the power back on. Then, follow the steps on the new thermostat to set up the Wi-Fi. Finally, test the thermostat to make sure it works. This process, when followed correctly, will ensure a functional and safe installation.
Gathering Your Tools and Materials
Before you begin the installation, collect the tools and materials you’ll need. This makes the procedure easier. You will need a screwdriver to remove and install the thermostat. A level can make sure the thermostat is straight. A voltage tester ensures you’ve turned off the power. Wire strippers help prepare the wires. The smart thermostat 2 wire heat only should come with the necessary wires. You may also need a C-wire adapter if your system doesn’t have a C-wire. Have everything ready so you won’t have to interrupt your work.
- Screwdriver: For removing and installing the thermostat.
- Level: To ensure the thermostat is mounted straight.
- Voltage Tester: Confirm the power is off.
- Wire Strippers: Prepare wires for connection.
- New Smart Thermostat: The main item.
- C-Wire Adapter (if needed): For power supply.
A good screwdriver is a necessity for removing the old thermostat and securing the new one. Make sure it’s the correct size.
A level guarantees that the thermostat looks neat and works correctly. It helps with visual appeal.
This is a safety tool. Always confirm the power is off to avoid electrical shock. Using a voltage tester protects you.
Wire strippers are useful for removing the insulation from the wires. This helps you get a good connection.
Make sure you have the smart thermostat 2 wire heat only. Read the included instructions before starting the installation.
Some thermostats need a C-wire, or common wire, to operate. If your system doesn’t have one, you might need a C-wire adapter. Check your thermostat’s instructions.
Step-by-Step Installation Guide
Follow this step-by-step guide for a successful installation of your smart thermostat 2 wire heat only. First, turn off the power at the breaker. Take off the old thermostat’s cover and label the wires. Remove the old thermostat from the wall. Attach the wires to the new thermostat, following the instructions. Mount the new thermostat on the wall using the screws. If needed, connect the C-wire adapter. Turn the power back on, and start up the new thermostat. Then, connect your thermostat to your Wi-Fi network. Testing the unit ensures everything is working correctly.
- Turn Off the Power: At the circuit breaker for your heating system.
- Remove the Old Thermostat: Take off the cover and unscrew it from the wall.
- Label the Wires: Label each wire before disconnecting them.
- Disconnect the Wires: Disconnect the wires from the old thermostat terminals.
- Connect Wires to the New Thermostat: Attach the wires to the corresponding terminals on the smart thermostat.
- Mount the New Thermostat: Place the smart thermostat on the wall and secure it with screws.
- Install C-Wire Adapter (if needed): If you don’t have a C-wire, follow the instructions to install the adapter.
- Turn the Power On: Switch the circuit breaker back on.
- Set Up Wi-Fi: Follow the thermostat instructions to connect to your Wi-Fi network.
- Test the Thermostat: Test the thermostat to ensure it controls your heating system correctly.
Safety is the most important thing. Shut off the power to prevent electric shock.
After turning off the power, remove the cover. Unscrew the thermostat from the wall.
Use labels or tape to mark each wire. It will make connecting the wires to the new thermostat easy.
Carefully disconnect the wires from the old thermostat terminals. Make sure you understand their positions.
Follow the instructions for the new thermostat to connect the wires correctly. Double-check your connections.
Make sure it’s level before screwing it into the wall. Attach the cover.
If your thermostat needs a C-wire, you will have to install the C-wire adapter, following the manufacturer’s instructions.
Once everything is connected, turn the power back on. Double-check that everything works before proceeding.
The instructions will guide you through connecting to your home’s Wi-Fi network. This allows remote control and other smart features.
Test the heating system to ensure that the thermostat controls it correctly. Make sure the heat starts and stops as you expect.
Dealing with Wiring Challenges and C-Wire Issues
Wiring challenges and the lack of a C-wire are common. Many older systems don’t have a C-wire, which is necessary for some smart thermostats. The C-wire provides continuous power to the thermostat. If you do not have a C-wire, you might need to use a C-wire adapter. This adapter draws power from the heating system. Another common challenge is identifying the right wires or dealing with incorrect wiring. Always double-check your connections. When in doubt, consult a professional to ensure a safe and effective setup.
- No C-Wire: Use a C-wire adapter or choose a thermostat that doesn’t need one.
- Incorrect Wiring: Double-check wire connections and follow instructions.
- Low Voltage: Ensure your heating system supplies enough voltage to the thermostat.
- Compatibility Issues: Confirm your thermostat is made for 2-wire systems.
- Professional Help: When unsure, always consult a qualified professional.
Many smart thermostats require a C-wire. If one isn’t available, an adapter is usually needed. This adapter draws power from the heating system. Some thermostats don’t require a C-wire. Picking a compatible thermostat can prevent the need for additional parts.
Incorrect wiring can prevent the thermostat from working. Always double-check wire connections against the thermostat’s instructions. If you’re unsure, seek help from a professional.
Verify that your heating system provides the correct voltage. Most thermostats run on 24V, but some systems vary. This can affect how the thermostat operates.
Make sure the thermostat is compatible with your heating system type. Check the product specifications. Incorrect compatibility will prevent the thermostat from operating correctly.
If you’re unsure about any step of the installation, consult a professional. Electricians and HVAC specialists can ensure the installation is safe and effective.
Troubleshooting Common Smart Thermostat Problems
After installation, issues may occur. The thermostat might not turn on or communicate with Wi-Fi. The heating system may not respond to the thermostat. This part will give you tips on how to fix common problems. If the thermostat won’t power on, double-check the wiring. If there are Wi-Fi problems, make sure the thermostat is within range of your router. If the heating system does not respond, make sure the thermostat settings are correct. Simple troubleshooting steps can fix most problems, but in difficult cases, contacting the manufacturer is an option.
Powering Issues
Powering issues are common. If the thermostat doesn’t turn on, ensure the breaker is on. Double-check all wire connections, and verify the C-wire or the adapter, if applicable. If you have any questions, consult the user manual for troubleshooting suggestions. Often, a simple check of the wiring will fix the issue. If the thermostat still doesn’t power on, it might need to be replaced. Proper power supply is essential to operate the device and its features.
- Check Breaker: Make sure the circuit breaker for your heating system is turned on.
- Wiring Connections: Double-check that all wires are correctly connected to the thermostat terminals.
- C-Wire or Adapter: Ensure the C-wire is properly connected, or the adapter is installed correctly.
- Replace Batteries: Some models use batteries as a power backup.
Sometimes, the breaker may be tripped or accidentally turned off. Check and turn it back on. This is a simple step, yet it’s often the fix for power issues.
Loose or incorrect wiring prevents the thermostat from receiving power. Double-check all connections against the instructions. Re-tighten any loose wire connections.
If your thermostat needs a C-wire, check that the C-wire is correctly connected. If using a C-wire adapter, follow the instructions to make sure it’s installed properly. This ensures a constant power supply.
Some thermostats use batteries as a backup power source. Check and replace the batteries if needed. This will help resolve power problems.
Wi-Fi Connectivity Issues
Wi-Fi problems can prevent you from using remote control and smart features. Make sure the thermostat is within range of your home Wi-Fi. Check your Wi-Fi network settings to verify that they are correct. If the thermostat can’t connect, reset it to factory settings and try the setup again. Sometimes, a reboot of your router can fix the problem. Poor signal strength or incorrect settings can disrupt Wi-Fi connectivity. Correctly resolving these issues is key to enjoying all of your thermostat’s smart functions.
- Wi-Fi Range: Ensure the thermostat is in range of your Wi-Fi router.
- Network Settings: Verify your Wi-Fi network settings.
- Restart Router: Restart your router to refresh the network connection.
- Factory Reset: Reset the thermostat to factory settings and try setup again.
The distance between the thermostat and the Wi-Fi router affects the signal strength. Move the thermostat or router closer to each other. This will make the connection stronger.
Confirm that the Wi-Fi network is working and that the password is correct. Incorrect network settings can stop the thermostat from connecting. Check your router settings to make sure everything is working.
A simple restart can often resolve Wi-Fi connection issues. Turn off the router. Wait a few seconds, then turn it back on. Then try connecting the thermostat to the network again.
A factory reset returns the thermostat to its original settings. You will need to set it up again. Follow the thermostat’s instructions to reset it.
Heating System Response Problems
If your heating system doesn’t respond, it can be frustrating. First, verify that the thermostat settings are correct. Check that the heating mode is on and that the temperature is set above the current room temperature. Double-check that the wiring is correct. If the heating system still doesn’t start, there might be a problem with the furnace itself. If necessary, consult an HVAC professional to diagnose the problem. Following these steps can help you pinpoint the issue and restore your system.
- Temperature Settings: Ensure the set temperature is higher than the room temperature, and the heating mode is enabled.
- Wiring: Verify the wiring connections between the thermostat and the heating system.
- System Compatibility: Ensure the thermostat is compatible with your heating system type.
- Call for Help: If the problem continues, contact a qualified HVAC technician.
The heating system won’t start if the set temperature is below the current room temperature. Make sure you select the proper heating mode. Review your settings to make sure the unit is set correctly.
Check the wiring connections to ensure that they are secure. Loose connections prevent the thermostat from sending signals. Follow the manufacturer’s instructions for the wires.
Make sure the thermostat is compatible with your heating system. Using an incompatible thermostat can prevent the heating system from working correctly. Check the model specifications.
If you’re facing difficulties, contact a professional HVAC technician. The technician can diagnose and fix complex problems. They can also ensure the system runs safely and effectively.
Common Myths Debunked
Myth 1: Smart Thermostats Are Difficult to Install
Many think that smart thermostats are difficult to install. The truth is most models are designed for user-friendly installation. Often, installation includes following clear instructions. Several models come with apps, making setup simpler. Most smart thermostats work in place of the old thermostat, using the same wiring. If you’re comfortable with basic electrical tasks, you likely can handle the install. If you’re hesitant, calling a professional is always an option.
Myth 2: Smart Thermostats Need a C-Wire for Operation
While many thermostats do need a C-wire for power, that’s not always the case. Some smart thermostat 2 wire heat only models have other power options. These thermostats use batteries or an adapter that gets power from the heating system’s wires. If your system doesn’t have a C-wire, you’re not out of options. Researching options is essential, and many models can work without one. Always verify the thermostat’s power requirements before purchasing.
Myth 3: Smart Thermostats Only Save Energy in Specific Climates
This is incorrect. Smart thermostat 2 wire heat only models can provide energy savings anywhere. They can help conserve energy by using schedules and automated settings. These thermostats adjust to your routine and heating preferences, no matter where you live. Even in mild climates, the smart features can boost efficiency by avoiding unnecessary heating. The energy savings depend on your usage patterns and the features of your thermostat.
Myth 4: Smart Thermostats Are Only for Tech-Savvy Homeowners
The perception that only tech-savvy people can use smart thermostats is untrue. Smart thermostats are made for easy use. They come with simple interfaces and intuitive apps. Many models have touch screens. The functions and settings are often easy to grasp, and they come with detailed instructions. Setting up schedules and remote control is simple, regardless of your tech knowledge. The main thing is to find a model that fits your needs.
Myth 5: Smart Thermostats Are a Security Risk
Some people think smart thermostats are a security risk, but many are designed with security in mind. Smart thermostats have several security features, such as data encryption and secure connections. Makers often use strong passwords. The devices connect to your network, so protect your Wi-Fi network. Regularly update your thermostat’s firmware. This improves security and keeps your data safe. Take the necessary steps, and you can enjoy the comfort and energy savings without having to worry about your data.
Frequently Asked Questions
Question: Can I install a smart thermostat myself?
Answer: Yes, in many cases, you can install a smart thermostat yourself, especially if you have a 2-wire system. The instructions are usually straightforward, but you should turn off the power at the breaker before starting.
Question: What if my 2-wire system does not have a C-wire?
Answer: If your system lacks a C-wire, you can opt for a smart thermostat that uses batteries, a C-wire adapter, or is designed to work without one.
Question: How much energy can a smart thermostat save?
Answer: Energy savings vary based on use and your current system. Smart thermostats typically save around 10-20% on heating and cooling bills by using efficient schedules.
Question: Are smart thermostats compatible with all heating systems?
Answer: Not all smart thermostats are compatible with every system. Check for compatibility with your 2-wire system. Look for thermostats labeled for compatibility.
Question: How do I connect my smart thermostat to Wi-Fi?
Answer: After installation, follow the thermostat’s app setup to connect to your home’s Wi-Fi network. Then you can control it remotely, and set up the thermostat’s smart features.
Final Thoughts
Upgrading to a smart thermostat 2 wire heat only system is an improvement. The process involves choosing the correct model and carefully following installation instructions. This post gave you an easy-to-follow guide to selecting and installing the right smart thermostat. Consider the advantages of the smart features for enhanced control and energy savings. Remember to check for 2-wire compatibility and consider features. The next step is to choose the correct thermostat model, use the easy installation guide, and enjoy a more comfortable, efficient home. With the right smart thermostat, you can improve your home’s energy use and your comfort at the same time.